Start with the exact component and use
Begin with the listing and point to the exact veneered component: the whole top, one drawer front, a door panel, a curved tambour or cylinder, an edge band, an apron or an applied decorative field. Record its dimensions, orientation, support, nearby joints, hardware and expected use. A lifted corner on a display cabinet and a moving loss beside a frequently pulled drawer handle are not the same purchase decision.
If the construction itself is still uncertain, use the solid wood, veneer and laminate Guide first. This Guide starts once veneer is documented or remains the credible working description; it does not identify timber species, adhesive or substrate from colour and grain alone.
Define the inspection unit
- ComponentName the top, side, door, drawer, curve, edge or decorative field and keep every photograph tied to it.
- DimensionsRecord the complete component and each visible change with a scale beside, not over, the surface.
- AssemblyShow adjoining rails, joints, mouldings, hardware, seams and any safely visible edge or underside continuation.
- UseNote touch, pulling, writing, heat, vessels, sunlight, cleaning, moving parts and anything placed on the surface.
- DecisionState whether the buyer needs stable use, conservation, cosmetic improvement, transport or a complete restoration budget.
Treat veneer as construction, not a defect
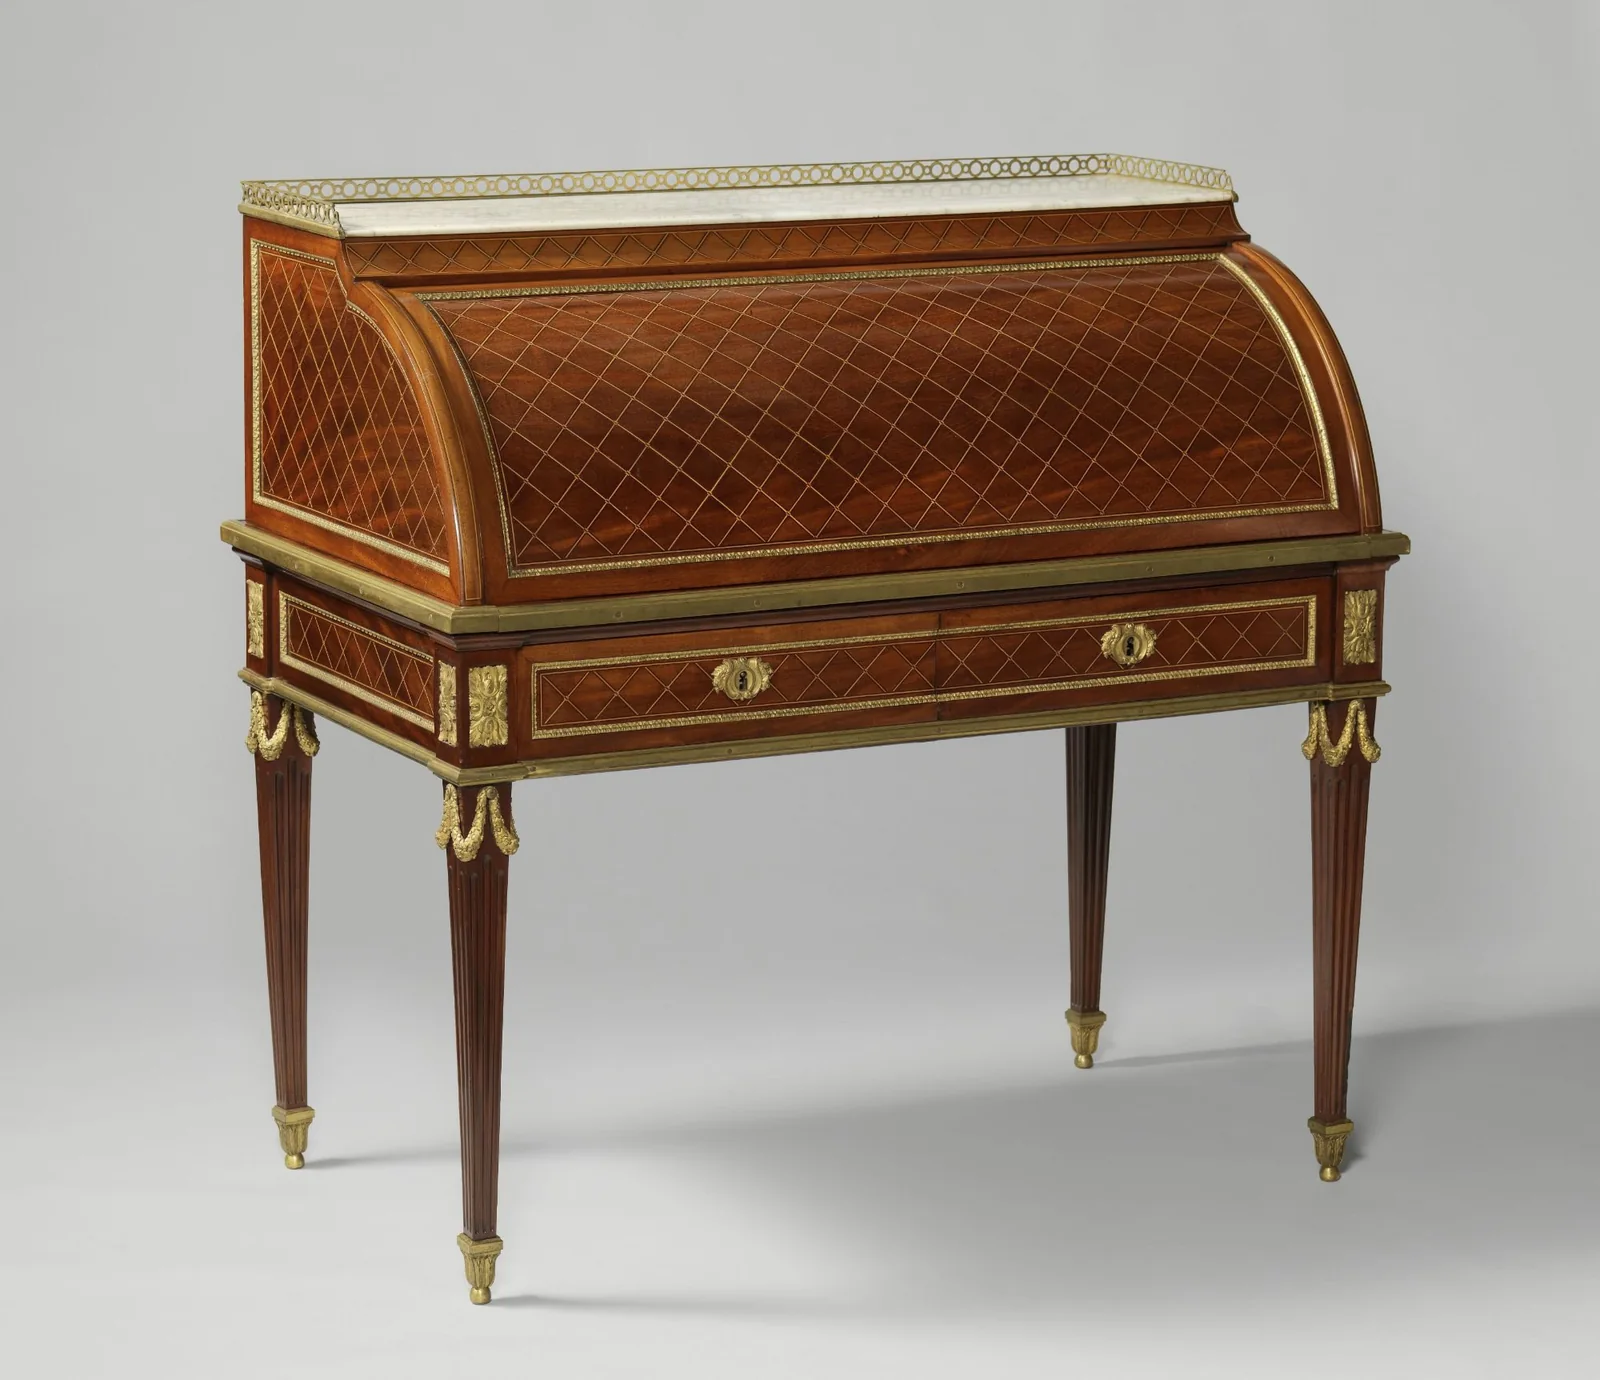
The Rijksmuseum describes Jean François Leleu's cylinder-top desk as a mahogany object decorated with marquetry of rosewood, amaranth, holly, tulipwood and other materials. Its elaborate veneered surfaces are intentional construction. The museum object helps orient the eye to faces, borders, curves and transitions; it does not show what damage on another piece means.[5]
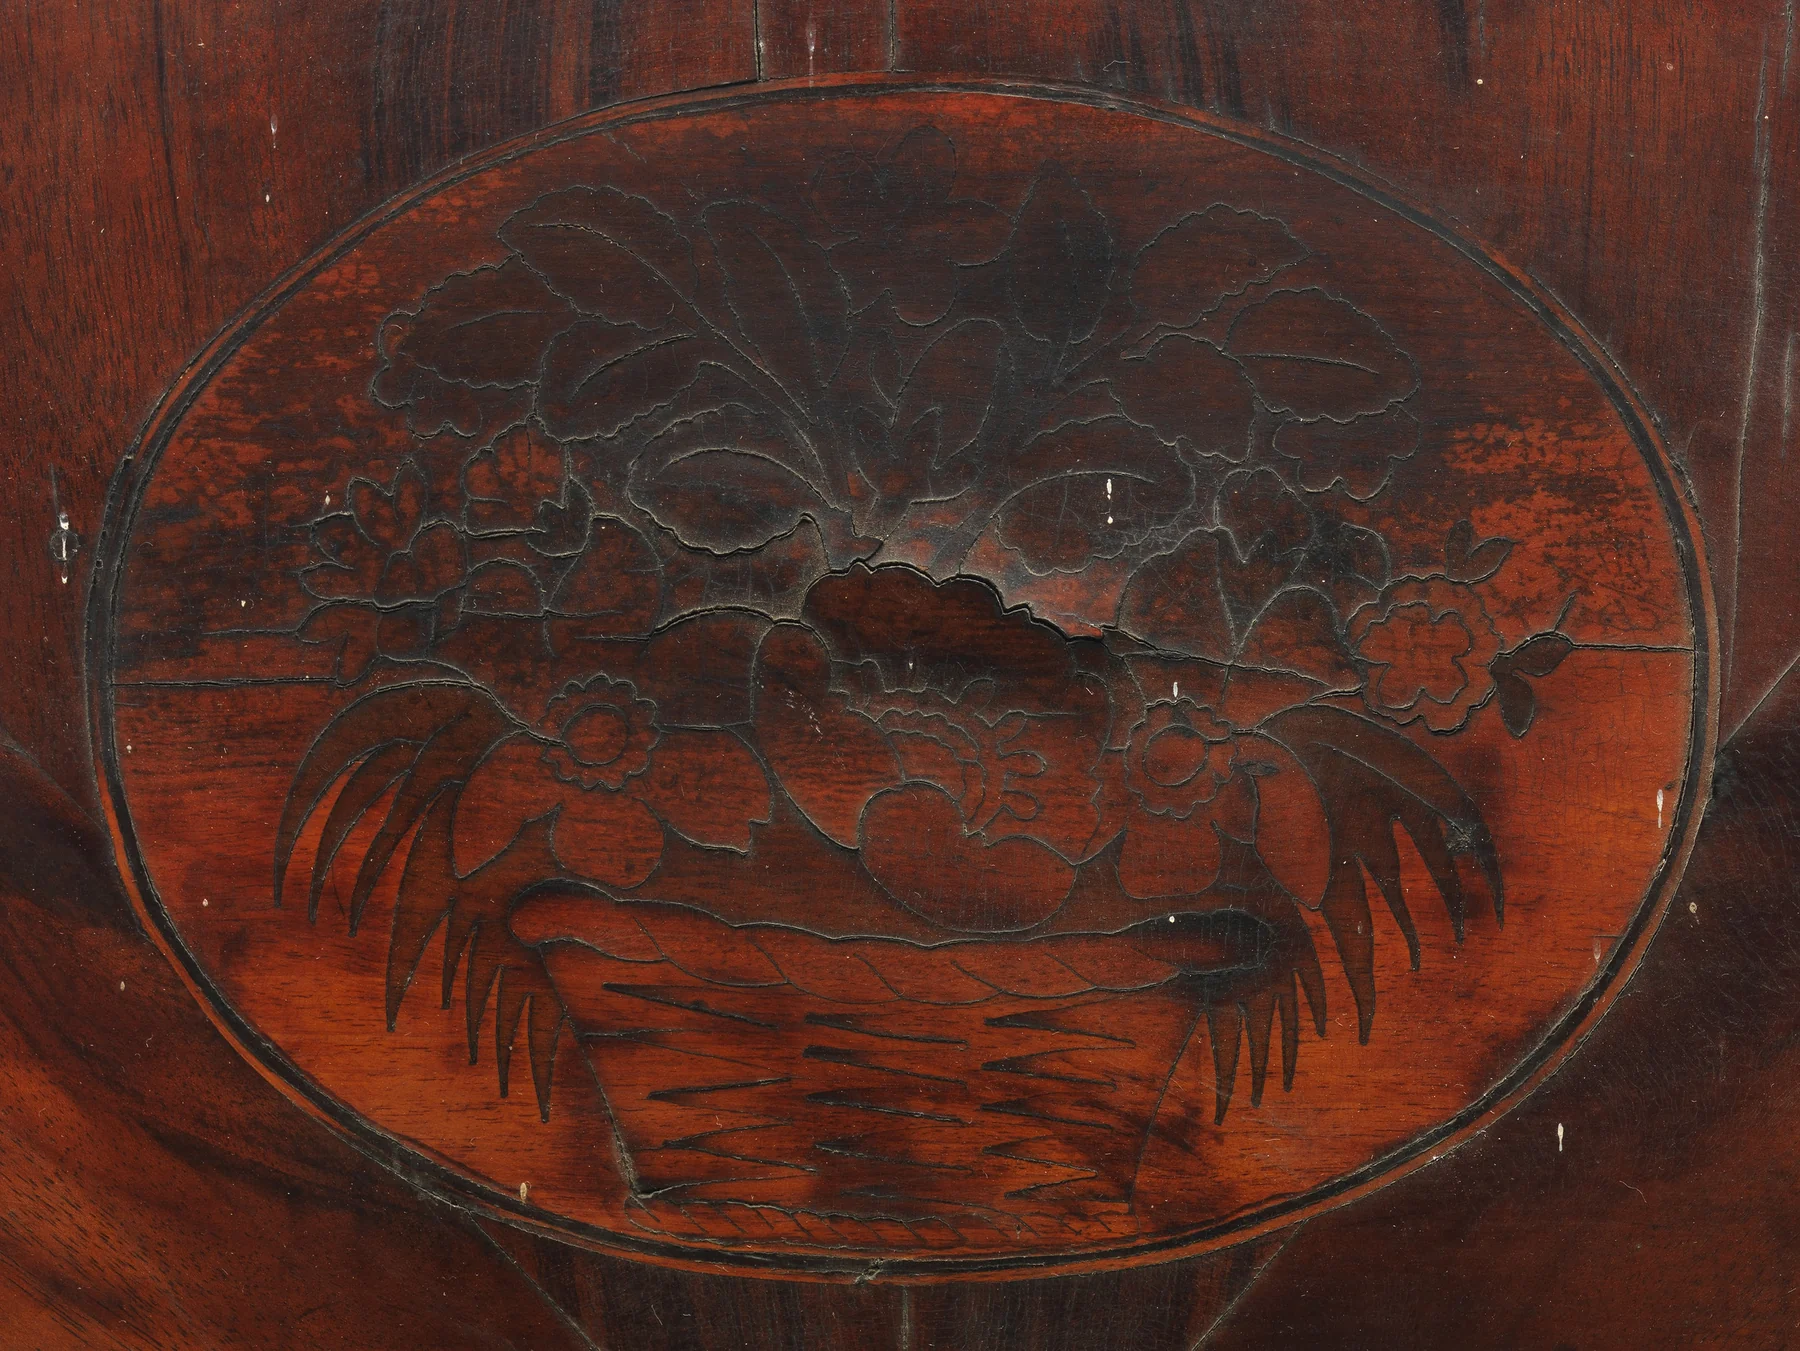
Veneer is a thin decorative or functional layer attached to another material. Its presence is not itself damage and is not a shortcut to low or high quality. Condition begins where that layer, its finish, its edge or the assembly beneath it has visibly changed. Keep intentional seams, matched grain and marquetry boundaries separate from cracks, lifting and losses.
| Visible feature | Record as | Question still open |
|---|---|---|
| Book-matched or repeated grain | An intentional arrangement when supported by the complete pattern | Species, date, maker and present bond |
| Straight border or decorative seam | A construction boundary if it continues coherently | Whether any adjoining edge is beginning to lift |
| Hairline crossing the pattern | A located line with width, length and continuation | Whether it is finish-only, veneer, substrate or movement |
| Raised area in raking light | A visible change in relief | Remaining bond, void, substrate shape and repairability |
| Different-coloured patch | A patch, fill, replacement or colour change only as evidence supports | Provider, material, date, reversibility and hidden work |
Map the complete surface assembly
Do not crop the inspection around the most dramatic bubble. Photograph the complete front, back, sides, top, base and safely visible underside of the furniture, then the complete face of each affected component. Follow every change to the nearest edge, seam, corner, joint, cut-out, hinge, pull, lock, support or underside. Damage that appears local in one close-up may continue around an edge or repeat across several restrained panels.
Cover every useful zone
- FacesShow the whole top, side, door, drawer or panel so the proportion and distribution of change stay visible.
- Edges and cornersRecord exposed veneer thickness, crushed rims, lifting tips, missing bands and impact points without touching them.
- Seams and pattern boundariesFollow joints between leaves, borders, inlay, marquetry and adjacent components rather than assuming every line is a split.
- Curves and openingsInclude rolls, tambours, rounded fronts, keyholes, escutcheons, cable holes and other places where layers are cut or bent.
- Hardware and movementShow pulls, hinges, locks, slides and rubbing parts where fasteners or repeated use can change nearby veneer.
- Underside and supportRecord only what is safely visible; never detach a top, back, lining or drawer structure merely to expose the substrate.
Inspection boundary
A hidden layer stays unknown
An edge view may reveal that a surface is layered, but it does not prove the complete substrate, adhesive or remaining bond. Do not convert a partial section into a description of the entire piece.
Photograph each change through three views
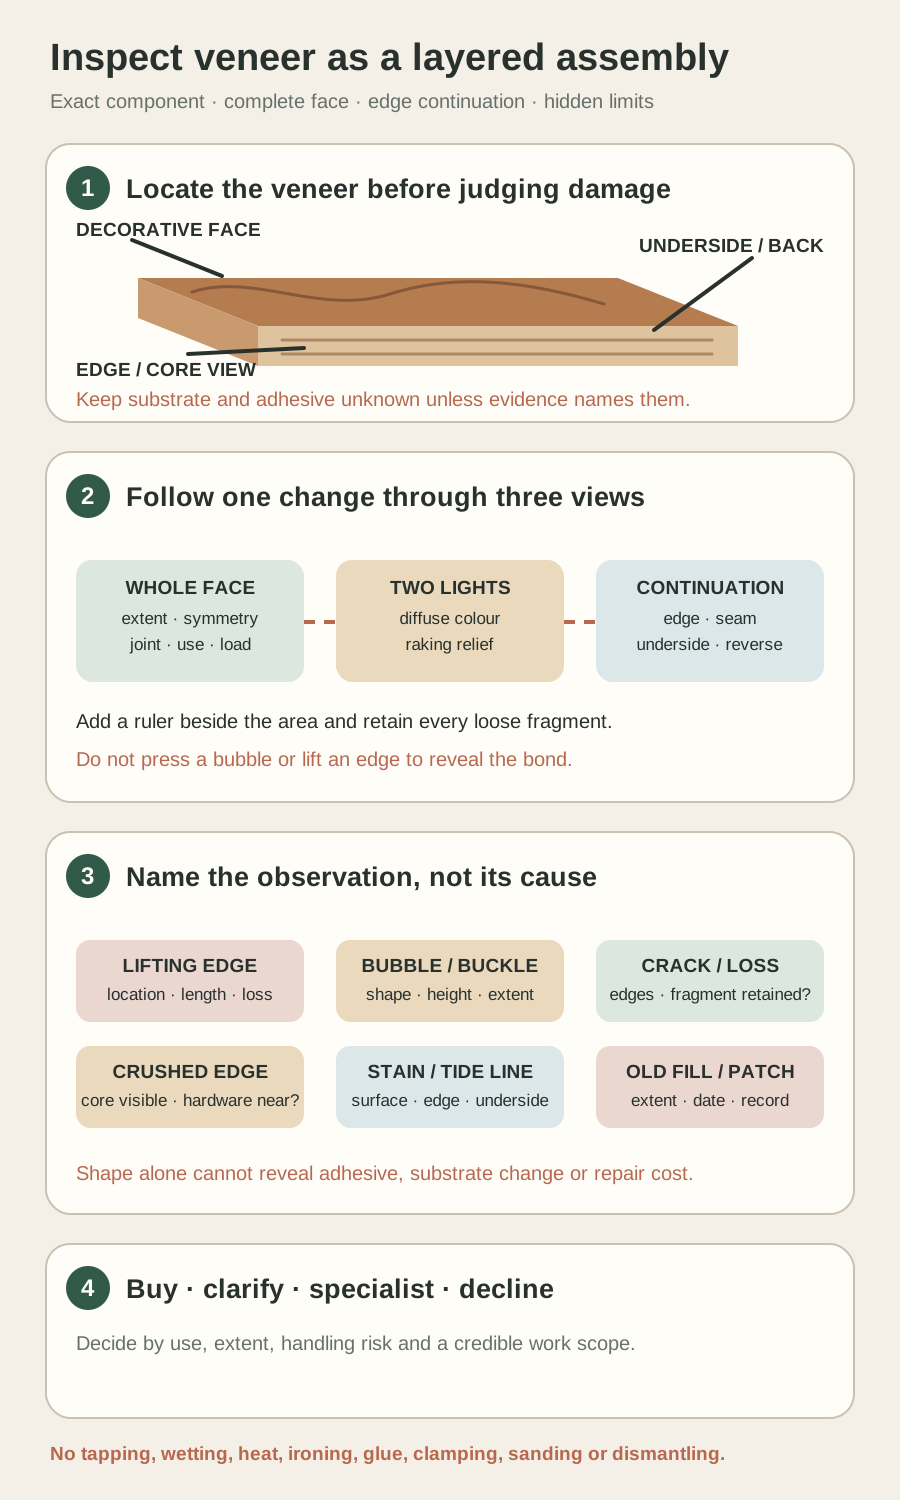
Give every observation an identifier such as T1 for top area one or D2 for door area two. Record a whole-component view, an area view that reaches a recognisable edge or hardware item and a close view with a ruler lying beside the surface. Repeat the area view in diffuse light and low raking light from more than one direction. Keep the camera angle, identifier and scale in the filename or caption.
| View | It should show | Avoid |
|---|---|---|
| Whole object | Orientation, use, support and every affected component | A single attractive listing angle |
| Whole component | Complete face, edges, pattern and distribution | Cropping away the nearest boundary |
| Area in diffuse light | Colour, stain, finish and relation to a fixed landmark | Flash glare or an edited shadow |
| Area in raking light | Relief, ripple, raised edges and changes across the face | Treating the shadow shape as proof of depth or cause |
| Close view with scale | Edge profile, loss, crack width and exact identifier | Pressing a ruler onto fragile material |
| Edge or underside continuation | Whether the same line, stain or distortion continues | Turning, lifting or dismantling an unsafe object |
Use the full furniture-photograph Guide when reflections, dark timber or seller image limits make the surface difficult to read. A short raking-light video can show changing relief, but it does not replace still frames with scale.
Name the observation before proposing a cause
The U.S. Forest Products Laboratory's diagnostic guide organises surface distortions in veneered furniture and cabinetry by their visible forms and the layered construction and process factors that may contribute to them. That diagnostic structure is useful precisely because a raised or sunken shape can have more than one explanation; a listing photograph cannot select the cause or treatment.[1]
| Observation | Measure or locate | Do not conclude |
|---|---|---|
| Lifted edge or corner | Length, maximum visible opening, movement only if already documented and nearby loss | Which glue failed or that pressure will close it |
| Bubble or blister-like rise | Outline, height only if non-contact measurement is possible, sound shadow and repetition | Whether a void, substrate or finish created it |
| Broad buckle or ripple | Direction, area, component boundaries and similar changes elsewhere | Moisture event, reversibility or structural stability |
| Crack or split | Width, length, direction, pattern crossing and edge or underside continuation | Which layer is split from the face alone |
| Loss or missing fragment | Exact outline, depth visible without probing and whether the fragment survives | That a visually similar patch will be simple |
| Crushed or abraded edge | Impact zone, exposed layers, loose fibres and handling path | That sanding will improve the edge |
Words such as loose, failed, warped, water-damaged and easy repair are conclusions unless the evidence supports their exact scope. Prefer ‘a raised oval area approximately 90 by 45 mm is visible in raking light on the right half of the top’ and attach the photographs. Precise observation makes a specialist answer more useful and protects the buyer from pricing an invented diagnosis.
Connect history without inventing it
The Canadian Conservation Institute explains that composite wooden objects can split, delaminate, buckle or distort when layers respond differently to changes in relative humidity, especially where movement is restrained. This supports asking about the complete assembly and environment. It does not allow one bubble to prove a damp room, a date or a single cause.[2]
CCI's recovery guidance warns that water-damaged veneer can be poorly attached, folded away from the surface and brittle. A tide line, mould report or known leak therefore changes the handling and specialist brief, but appearance alone neither confirms mould nor identifies what happened.[3]
Ask for the history that can change scope
- Onset and changeWhen was each area first noticed, and has a dated image set shown growth, movement or new loss?
- EnvironmentAsk about known leaks, floods, damp, direct heat, strong sun, storage moves and rapid environmental changes without treating recollection as proof.
- Use and impactRecord hot or wet objects, plant pots, repeated cleaning, dragged items, knocks, moving parts and load on the component.
- Previous workRequest provider, date, materials, invoices and before-and-after photographs for pressing, patching, filling, refinishing or structural work.
- Detached materialAsk whether labelled fragments, edge bands or inlay pieces remain and where they came from; do not ask the seller to refit them.
Look for corroboration across the object: a stain that continues around an edge, repeated changes near several restrained corners, corrosion beside a tide line or an old invoice tied to the same component. Correlation can improve the question, but the Guide still leaves material cause and treatment to examination.
Protect fragile veneer and detached evidence
The Metropolitan Museum of Art's handling guidance identifies loose or lifting veneer as a snag and pressure risk and emphasises retaining detached pieces with their object information. For a buyer, the transferable lesson is a stop boundary: do not discover stability by pressing, sliding a cloth over the surface or letting packaging catch a raised edge.[4]
Keep the inspection non-interventive
- Do not press or flexA raised area can move, crack or detach under a fingertip and movement does not reveal a safe repair.
- Do not tap or probeSound and resistance need controlled professional interpretation; a buyer should not strike or insert anything beneath an edge.
- Do not wet, heat or ironMoisture and heat can change veneer, finish, adhesive, substrate and old repairs before the assembly is known.
- Do not inject or add glueAn adhesive choice and pressure plan belong to a treatment proposal, not a seller photography request.
- Do not sand or disguiseSanding can pass through thin veneer; filler and colour can hide the edge and remove evidence needed to scope work.
- Do not improvise packingLoose fragments, lifting edges and vulnerable faces need the specialist or experienced carrier to define protection and orientation.
Detached fragment
Keep identity and location together
If a piece is already detached, photograph it beside a non-contact scale and its exact loss, label its object and location, and keep it from abrasion or confusion. The person responsible for treatment or transport should specify the container and handling.
Scope the intervention before pricing it
A useful specialist brief asks what must be stabilised, what can remain as evidence of age, whether access or dismantling is required, how the finish and adjoining decoration constrain work, what structural or environmental cause must be addressed, how visible the result is expected to be and how the piece can travel. ‘Glue the bubbles’ is not a scope. Neither is a price based only on the number of raised areas.
| Question | Evidence needed | Decision affected |
|---|---|---|
| Is immediate stabilisation needed? | Exact loose edges, fragments, movement and handling risk | Whether the object can be viewed, stored or transported normally |
| How broad is the unresolved bond? | Physical examination, mapped relief and assembly access | Local treatment versus a wider intervention |
| What lies beneath? | Construction evidence and only justified examination | Method, pressure, access and uncertainty allowance |
| What finish or decoration is at risk? | Surface examination, history and treatment records | Conservation boundary and expected appearance |
| What caused or continues the change? | Environment, use, structure and corroborating evidence | Whether treatment can remain stable |
| What is excluded from the estimate? | Written assumptions, access limits and contingency | Total commitment and decline threshold |
Put the resulting scope into the pre-purchase restoration budget. If work is already claimed, use the restored or refinished furniture Guide to match the provider, materials and before-and-after record to the exact veneered area.
Request the evidence and make a bounded decision
Message to copy
Ask for a complete veneer condition map
Hello—I'm considering this exact piece for [intended use]. Could you identify every component described as veneer or marquetry and send complete front, rear, side, top, base and safely visible underside views; then a whole, area and close view with a ruler beside each lifted edge, raised or buckled area, crack, loss, crushed edge, stain, tide line, fill, patch and other repair? Please repeat affected areas in neutral diffuse and low raking light, follow each change to the nearest edge, seam, corner, hardware item or underside, and label the views consistently. Could you also describe when each area was noticed; any known water, damp, heat, sun, impact, cleaning, storage or movement history; previous veneer, finish or structural work with documents; and whether any detached labelled fragments remain? Please do not press, tap, lift, wet, heat, iron, glue, fill, sand, dismantle, clean or pack a fragile area for my request. Mark every unknown explicitly. Thank you.
| Decision | Appropriate when | Record |
|---|---|---|
| Buy | The mapped condition, use, transport and scoped intervention or accepted wear fit the total commitment | Complete view set, known history, handling boundary and budget assumptions |
| Clarify | One missing face, edge continuation, measurement, fragment or history item could change the decision | One exact follow-up question tied to the component identifier |
| Specialist before purchase | Lifting, broad distortion, recurring cracks, loss, water evidence, moving parts or important decoration makes the hidden assembly consequential | Inspection remit, access, transport limit, written scope and estimate boundary |
| Decline | Evidence, safe handling, specialist access or a tolerable repair range is unavailable | The unresolved fact and its consequence, without diagnosing or devaluing the object |
Good veneer can carry design, craft and history that solid timber alone could not produce. The aim is not to reject every raised edge or old patch. It is to know which exact surface has changed, protect it from an improvised test and price only the intervention that credible evidence can support.