
Start with a small drawing
Sketch your intended shelving from the front and label each bay. Note the depth, height and desired shelf levels. Now map the seller’s parts onto that sketch. This is easier to check than an advertisement saying “two IVAR shelves” when “shelf” might mean a board, a bay or the whole unit.
Ask for an assembled photograph if possible, plus a laid-out photograph of loose parts. Keep cabinets, drawers and corner sections separate in the inventory: each can introduce its own fitting and space requirements.
For the story behind the system, read IVAR in the Furniture Library; its history is a separate question from the compatibility of a used set.
The small fittings complete the shelf
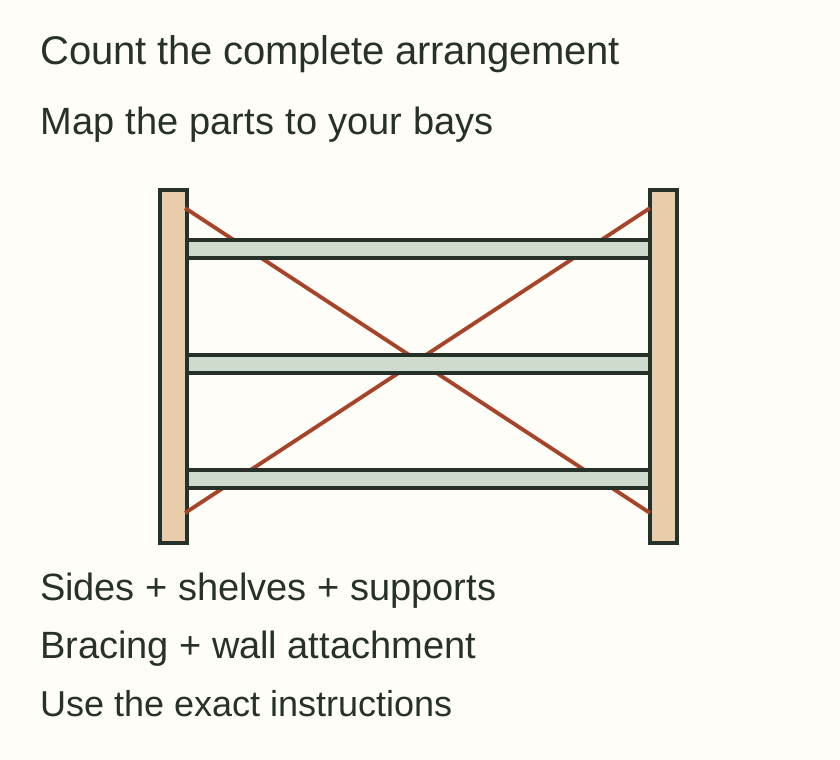
For one current IVAR combination, IKEA lists two side units, five shelves and an OBSERVATÖR cross-brace. That specific bill of parts shows why the upright frames and boards alone are not a complete inventory. Use the instructions for your chosen combination rather than copying this count to a different one.[1]
Photograph and count these groups separately.
- Side units. Quantity, width/depth and height, end condition and hole pattern.
- Shelves. Each size, quantity, underside/end details and any cut-outs.
- Shelf supports. Complete matching fittings for the exact shelf and side-unit generation.
- Bracing and attachments. The parts and sound fixing positions required by the exact assembly and securing instructions.
Do not describe a box of loose metal fittings as complete without matching them to the instructions. A shelf with a missing support remains an incomplete shelf. Identify a replacement and check availability before treating it as a trivial extra expense.
Will older IVAR parts fit newer ones?
Start with the dimensions and article numbers you can establish, then compare the shelf ends, supports and mounting details with the relevant documentation. Similar colour, hole spacing or advertised width is not sufficient confirmation for a mixed lot.
For example, a seller may include boards of two depths in one photograph. A front view can make them look identical. Ask for a side view and measurements before allocating them to your planned bays; do the same for unfamiliar metal or plastic shelf-end fittings.
Send IKEA clear photographs of any uncertain combination and ask about the exact parts involved. An answer about one current shelf does not establish compatibility with every earlier version. If a crucial part cannot be identified, leave that bay out of the valuation until it can.
Look for changes that affect reassembly
Colour variation, pencil marks and a few old screw holes may be acceptable on utilitarian shelving. Compare them with your intended finish before planning unnecessary sanding. A painted or stained set can still be useful if you like it as it is and its important connections remain visible.
Inspect shelf ends, the lower ends of side units and the areas that take braces or fixings. Ask about damp storage, heavy loading, previous moves, cuts and added holes. A bowed shelf or damaged support position deserves a decision about replacement or assessment, not a promise that the next load will flatten it.
See the unit assembled where practical. For dismantled parts, request photographs of the connections before collection and group each shelf with its matching fittings. Do not force a support into an enlarged or incompatible hole to make the inventory add up.
Bracing and wall attachment do different jobs
IKEA requires this IVAR unit to be anchored and says to use attachment hardware suitable for the wall, seeking professional advice if uncertain. Check the exact instructions for the unit you are buying and make that installation possible before loading it.[1]
A rear cross-brace and an attachment to the wall are different parts of the arrangement. The presence of one does not remove the documented need for the other. Keep both in the inventory and ask about damaged attachment positions.
Measure the assembled width and depth at the intended wall, including skirting and nearby doors. Establish the permitted load for the identified shelves and installation from the documentation; appearance is not a load rating. Plan heavier belongings within that guidance rather than testing a used shelf by adding weight until it moves.
Compare usable bays, not the pile
Message to the seller
I want to build [number] bays at [depth and height]. Could you list each side unit and shelf size, photograph the labels and shelf-end/support details, and show all included braces and attachment parts? Please flag cuts, bowed shelves, damp damage and missing fittings, and identify the instructions for the assembled set.
Price the complete result: usable parts, confirmed replacements, transport and installation. A smaller matching set can be a better buy than a larger mixed lot whose missing fittings leave your planned storage unfinished.